Excel Guide

How to make a checkmark in Excel step-by-step guide

This step-by-step guide explains how to insert a check mark in Excel, providing various methods to enhance your spreadsheets and improve task management.

In this article, let's explore how to include a checkmark in Excel using various methods. Whether you prefer using the Symbol menu, keyboard shortcuts, or Excel functions, we’ve got you covered.

Method 1: Insert - Symbol Menu

You can use the Symbol menu in the Excel ribbon to add a checkmark.

  1. Open the Symbol Menu: Click on the Insert tab, then select the Symbol dropdown.
  2. Select the Symbol: In the Symbol dialog box, choose the Wingdings font and scroll down to find the check mark character.
  3. Insert the Symbol: Select the check mark and click the Insert button, then close the dialog box.

Method 2: ALT Code Shortcut

Another way to insert a checkmark is by using the ALT code shortcut.

  1. Set the Font: Change the font of the target cell to Wingdings.
  2. Use the ALT Code: Hold the ALT key and type 0252 on the numeric keypad.

If you see a character like "ü" instead of a check mark, simply change the font of that cell to Wingdings.

Note: This method works only on Windows, as Mac does not support ALT codes in the same way.

Method 3: UNICHAR Function

You can also insert a check mark using the UNICHAR function, which returns the Unicode character for a given code.

  1. Enter the Formula: In the cell where you want the check mark, type =UNICHAR(10003) for a standard check mark or =UNICHAR(10004) for a bold check mark.

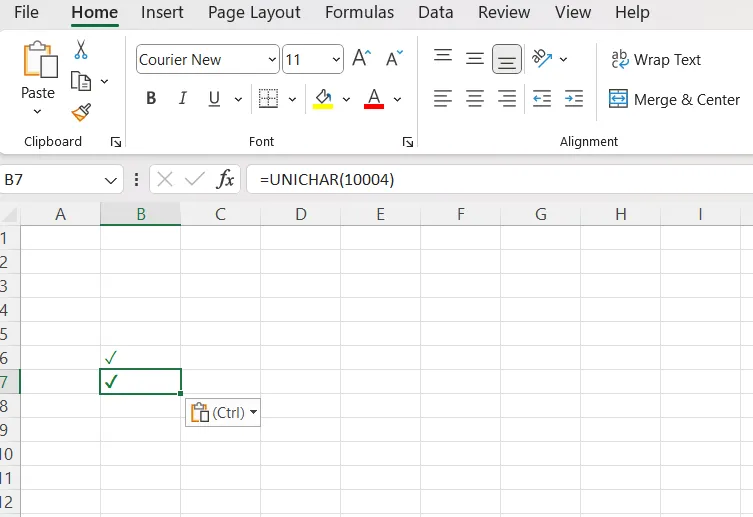
The UNICHAR function is useful because it doesn't require changing the font, but the check mark must be the only content in the cell.

[ 01 ]

Using a Bank?

Here’s what your Finance team endures — experience their pain.
Compare
[ 02 ]

Working with an FX Broker?

Are they really looking out for your best interests? Understand the trade-offs.
Compare
[ 03 ]

Using other Fintechs?

Are they truly solving your needs? Compare and see the difference.
Compare